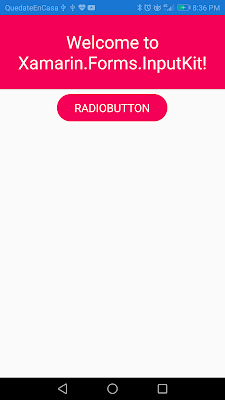
En el ejemplo a desarrollar es para Android haciendo uso de Xamarin.Forms en Visual Studio 2019 con MVVM y C#. Sin mayor detalle iniciemos, ahora nos centraremos en la funcionalidad del control de RadioButton.
Configura la biblioteca con los siguientes pasos:
- Incluye el paquete de Nuget Xamarin.Forms.InputKit en todos tus proyectos.
- Inicialízalo en los proyectos de destino llamando:
- Referencia al namespace de InputKit en el XAML agregando la línea en la declaración de la página xmlns:
- Instancié el namespace input a los controles que desees utilizar
Propiedades de RadioButton - InputKit:
- SelectedIndex: Obtiene o establece el botón de radio seleccionado dentro de sí mismo según el índice - valor int.
- SelectedItem: Obtiene o establece el botón de radio seleccionado dentro de sí mismo de acuerdo al valor - valor de tipo object.
- Clicked: Evento que invoca cuando se realiza clic.
- ClickCommand: Comando para enlazar y ejecutar cuando se hace clic - valor int.
- Value: Un sólo valor se mantiene dentro y groupview devuelve ese valor como SelectedItem - valor de tipo object.
- IsChecked: Obtiene o establece el botón de opción seleccionado - valor bool (True / False)
- Text: Cadena de texto para mostrar la descripción del botón según opción.
- TextFontSize: Tamaño de fuente del texto - valor double.
- Color: Color del punto seleccionado del botón según opción.
- TextColor: Color del texto.
Ejemplo práctico:
Para este ejemplo implementaremos una un PageContext con 5 seccione, donde la primera sección estará formado por 2 RadioButton con el fin de controlar la cuarta sección (fecha y hora - ingreso manual), en la quita se mostrará los valores ingresados en la segunda, tercera y cuarta sección (dependiente del ingreso a considerar ya sea Automático o Manual).
XAML completo del archivo PageRadioButton.xaml
En nuestro MVVM el fragmento a considerar para controlar los 2 RadioButton's (Automático Text="Automático" Value="TD" o Manual Text="Manual" Value="PD") que están dentro del RadioButtonGroupView es el Frame de nombre x:Name="fSecDeterminar"; el valor asignado a cada RadioButton's (Value="TD" / Value="PD") nos servirá para controlar desde el CodeBehind:
<?xml version="1.0" encoding="utf-8" ?>
<ContentPage xmlns="http://xamarin.com/schemas/2014/forms"
xmlns:x="http://schemas.microsoft.com/winfx/2009/xaml"
xmlns:input="clr-namespace:Plugin.InputKit.Shared.Controls;assembly=Plugin.InputKit"
x:Class="D01InputKit.Views.PageRadioButton"
Title="RadioButton">
<ContentPage.ToolbarItems>
<ToolbarItem Priority="1" />
</ContentPage.ToolbarItems>
<ContentPage.Content>
<AbsoluteLayout
BackgroundColor="White" Margin="5,0,5,5">
<Grid VerticalOptions="FillAndExpand" Padding="8,5,8,10" BackgroundColor="Transparent">
<Grid.RowDefinitions>
<RowDefinition Height="Auto"/>
<RowDefinition Height="Auto"/>
<RowDefinition Height="Auto"/>
<RowDefinition Height="Auto"/>
</Grid.RowDefinitions>
<Grid Grid.Row="0">
<StackLayout HorizontalOptions="FillAndExpand" Spacing="10">
<Frame Padding="10,10,10,10" x:Name="fSecDeterminar" IsVisible="True">
<input:RadioButtonGroupView HorizontalOptions="FillAndExpand" Orientation="Horizontal" x:Name="tipIngreso" SelectedItemChanged="ingSelected">
<input:RadioButton x:Name="ingSelectedTD" TextFontSize="17" TextColor="#424949" Text="Automático" Value="TD" IsChecked="True"/>
<input:RadioButton x:Name="ingSelectedPD" TextFontSize="17" TextColor="#424949" Text="Manual" Value="PD" />
</input:RadioButtonGroupView>
</Frame>
</StackLayout>
</Grid>
<Grid Grid.Row="1">
<Frame Padding="10,10,10,10" x:Name="fSecValue" IsVisible="True">
<StackLayout
HorizontalOptions="FillAndExpand" Orientation="Horizontal">
<Label Text="VALOR:" WidthRequest="50" TextColor="#424949" HorizontalOptions="StartAndExpand" FontSize="15" VerticalOptions="Center"/>
<Frame
BorderColor="#6fb7ff" HasShadow="False" Padding="0">
<Editor x:Name="editorValueGlu" WidthRequest="130" FontSize="16" Placeholder="Ingresa Valor" Text="" VerticalOptions="StartAndExpand"
HorizontalOptions="StartAndExpand" Keyboard="Numeric" MaxLength="3" HeightRequest="45"/>
</Frame>
<Button x:Name="btnIng" Clicked="ing_Clicked" Text="Ingresar" FontSize="Small" TextColor="White"
BackgroundColor="#f50057"
CornerRadius="5" WidthRequest="100" HeightRequest="45"/>
</StackLayout>
</Frame>
</Grid>
<Grid Grid.Row="2">
<Frame Padding="10,10,10,10" x:Name="comentValue" IsVisible="True">
<StackLayout
HorizontalOptions="FillAndExpand" Orientation="Horizontal">
<Frame
BorderColor="#6fb7ff" HasShadow="False" Padding="0">
<StackLayout>
<Editor WidthRequest="305" Margin="4,0,4,0" x:Name="comentValueGlu" FontSize="Small" Placeholder="Ingresa una nota" Text=""
HorizontalOptions="FillAndExpand" VerticalOptions="FillAndExpand" Keyboard="Text" MaxLength="100" HeightRequest="55"/>
</StackLayout>
</Frame>
</StackLayout>
</Frame>
</Grid>
<Grid Grid.Row="3">
<Frame Padding="10,5,10,5" x:Name="fSecDateTime" IsVisible="False">
<StackLayout
HorizontalOptions="FillAndExpand" Orientation="Horizontal">
<Label Text="FECHA:" TextColor="#424949" HorizontalOptions="StartAndExpand" FontSize="15" VerticalOptions="Center"/>
<DatePicker Format="dd/MM/yyyy"
x:Name="dpFechaIng" TextColor="#424949" FontSize="16"
HorizontalOptions="EndAndExpand" BackgroundColor="Transparent"
MinimumDate="01/01/1920" MaximumDate="12/31/2030"
/>
<Label Text="HORA:" TextColor="#424949" HorizontalOptions="StartAndExpand" FontSize="15" VerticalOptions="Center"/>
<TimePicker Format="hh:mm tt"
x:Name="tpickerTime" TextColor="#424949" FontSize="16" HorizontalOptions="EndAndExpand" BackgroundColor="Transparent" />
</StackLayout>
</Frame>
</Grid>
<Grid Grid.Row="4">
<Frame x:Name="fGrillaViewDetails" HasShadow="False" Padding="5"
BackgroundColor="Transparent" BorderColor="#6fb7ff">
<StackLayout>
<Label Text="VALOR:" WidthRequest="80" TextColor="#424949" HorizontalOptions="StartAndExpand" FontSize="15" VerticalOptions="Center"/>
<Label x:Name="lblValor" FontSize="16" Text="................." VerticalOptions="EndAndExpand"
HorizontalOptions="StartAndExpand"/>
<Label Text="NOTA:" WidthRequest="80" TextColor="#424949" HorizontalOptions="StartAndExpand" FontSize="15" VerticalOptions="Center"/>
<Label x:Name="lblNota" FontSize="16" Text="................." VerticalOptions="EndAndExpand"
HorizontalOptions="StartAndExpand"/>
<Label Text="FECHA:" WidthRequest="80" TextColor="#424949" HorizontalOptions="StartAndExpand" FontSize="15" VerticalOptions="Center"
IsVisible="False" x:Name="etiquetaFecha"
/>
<Label x:Name="lblFecha" FontSize="16" Text="................." VerticalOptions="EndAndExpand" IsVisible="False"/>
</StackLayout>
</Frame>
</Grid>
</Grid>
</AbsoluteLayout>
</ContentPage.Content>
</ContentPage>
Implementar el CodeBehind PageRadioButton.xaml.cs
El método ingSelected se encarga de controlar los controles en base a los valores de los RadioButton's (Automático Text="Automático" Value="TD" o Manual Text="Manual" Value="PD"):
using System;
using Xamarin.Forms;
using Xamarin.Forms.Xaml;
namespace D01InputKit.Views
{
[XamlCompilation(XamlCompilationOptions.Compile)]
public partial class PageRadioButton : ContentPage
{
public PageRadioButton()
{
InitializeComponent();
tpickerTime.Time =
DateTime.Now.TimeOfDay;//Horario actual
dpFechaIng.Date =
DateTime.Now.Date;//Fecha actual
editorValueGlu.Focus();
}
#region 1radioButton
/// <summary>
/// Método para controlar los RadioBUttons según el
RadioButtonGroupView
/// </summary>
/// <param name="sender"></param>
/// <param name="e"></param>
private async void ingSelected(object sender, EventArgs e)
{
reset_Clicked();
var item = tipIngreso.SelectedItem.ToString();
if (item == "TD")
{
fSecValue.IsVisible = true;
fSecDateTime.IsVisible = false;
lblFecha.IsVisible = false;
etiquetaFecha.IsVisible = false;
}
if (item == "PD")
{
tpickerTime.Time =
DateTime.Now.TimeOfDay;//Horario actual
dpFechaIng.Date = DateTime.Now.Date;//Fecha actual
fSecValue.IsVisible = true;
fSecDateTime.IsVisible = true;
lblFecha.IsVisible = true;
etiquetaFecha.IsVisible = true;
}
}
#endregion
protected override async void OnAppearing()
{
base.OnAppearing();
}
private async void ing_Clicked(object sender, EventArgs e)
{
if ((string.IsNullOrWhiteSpace(editorValueGlu.Text))
|| (string.IsNullOrWhiteSpace(editorValueGlu.Text)))
{
await DisplayAlert("Alerta", "Debe ingresar un
valor.", "Aceptar");
editorValueGlu.Focus();
}
else if ((string.IsNullOrWhiteSpace(comentValueGlu.Text))
|| (string.IsNullOrWhiteSpace(comentValueGlu.Text)))
{
await DisplayAlert("Alerta", "Debe ingresar una
nota.", "Aceptar");
comentValueGlu.Focus();
}
else
{
lblValor.Text =
editorValueGlu.Text;
lblNota.Text =
comentValueGlu.Text;
lblFecha.Text =
Convert.ToString(dpFechaIng.Date.ToString("dddd,
dd MMMM yyyy"));
clear_Clicked();
OnAppearing();
}
}
private void
clear_Clicked()
{
editorValueGlu.Text = null;
comentValueGlu.Text = null;
}
private void
reset_Clicked() {
lblValor.Text = null;
lblNota.Text = null;
lblFecha.Text = null;
editorValueGlu.Text = null;
comentValueGlu.Text = null;
}
}
}
Resultado:
Documentación:
Documentación Xamarin.Forms.InputKit.
Intalación y comando NuGet Xamarin.Forms.InputKit.
CheckBox Nativo de Microsoft.
Descargar Ejemplo:
Gracias a todos ustedes por la acogida de este nuevo articulo, éxitos y bendiciones 🙏 y un gran abrazo a todos ✌...!!! Como siempre gratitud a Dios 😊


0 Comentarios